

Sennheiser HD700 Anaxilus Mod – Fix Your Treble Woes with this Simple Mod

Introduction –
There is no shortage of guides or remarks about the Anax mod for the HD800; in short owners are installing an adhesive foam ring around the drivers to tame the high-frequency spike that can make the HD800 sound somewhat fatiguing. But ironically, there is next to nothing detailing the mod on the HD700, understandably a less popular model but one that, if anything, requires the mod even more. So today I’ll be doing just that, writing a short guide outlining the steps to performing this modification on your HD700. Lucky for us, it’s actually extremely simple and easier than the original HD800 mod due to the HD700’s simple earpad swapping mechanisms.
Materials were drawn from Tyll’s original Anax mod article on Innerfidelity. If you haven’t already had a read through, I highly suggest having a look at his original article for the HD800; he details the main improvements in detail with in-depth measurements and analysis.
Equipment –
While this is hardly the most complex modification, having the right tools available does make the process considerably easier. To perform the Anax mod you will require:
- Scissors
- 2mm adhesive backed foam
- Printer
- Template
- Stapler
- Sharp hobby knife
- Hobby snipper
- Cutting Board
Of note, I definitely recommend using a very sharp blade for all of the cutting and of course, watch your fingers and cut with patience. The snippers are not necessary but will help to produce cleaner results. A cutting board will prevent you from damaging the surface you are cutting on, though some thick cardboard should work almost as well.
Method –
First, download and print the template here (taken from Innerfidelity and scaled to fit the HD700). Ensure that any scaling features are turned off before printing.

If you don’t have Abobe Photoshop, you can use the image above (right click, save image), just ensure that the inner diameter of the rings equals 37mm. Disregard the 5-inch bar.

Gather the required equipment, it would be a good idea to keep everything close by during the procedure for convenience sake. Cut a rectangle around the two rings, leave about 5-10mm around the edges except the bottom, cutting along the base of the two triangular protrusions will save you some cutting time later.

Line up the base of the triangular facets of the rings to the adhesive foam (sticky side down) and staple each corner to secure the template over the foam.

Cut out the rectangle of foam and cut down the middle to separate the rings. Add additional staples to each corner and in the centre of the rings, we will cut that part out later. Make sure not to staple over the rings themselves.

Use an X-acto or sharp hobby knife start cutting out the rings. Keep the blade squared and rotate the foam to keep a clean line. Try to cut in one go, otherwise you’ll get a serration where the blade was removed and replaced. The rings should ultimately looks like this:


At this point, you can use the snippers to clean off any rough edges, they generally work better than scissors.
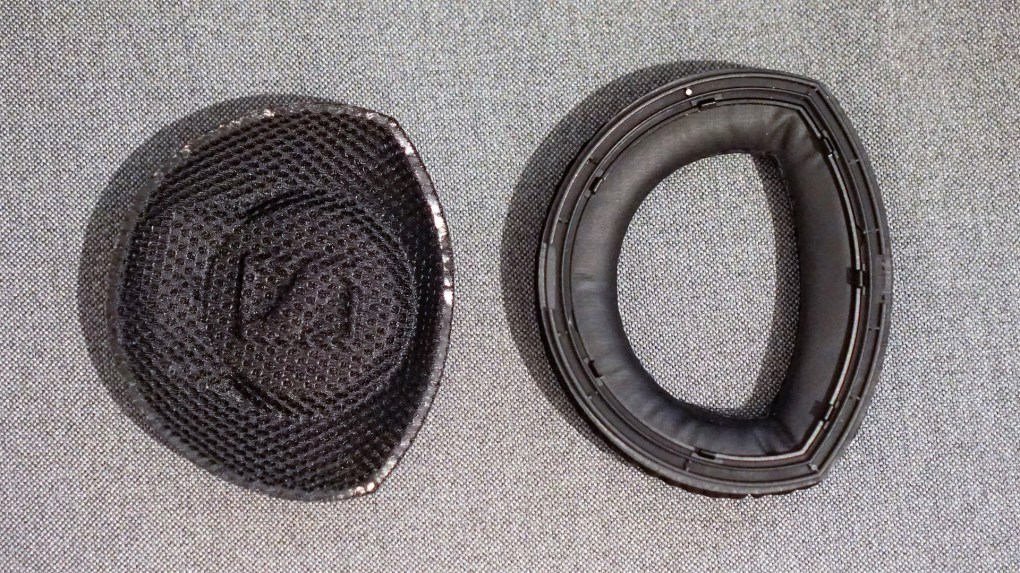
Mesh cover – Earpad moutning plate with clips
Now all we have to do is install the foam onto the headphones. Luckily, the earpads are extremely easy to remove on the HD700, you simply grab the inner lip below the microfiber part and pull; the earpads connect via three clips, they are fairly loosely attached. The fabric mesh on the inside is held in place by the earpads, it should fall off after the earpads are removed. Set the mesh and earpads to the side, you don’t want to lose or damage either as replacements from Sennheiser are quite dear. Also be sure not to put too much pressure through the silver mesh on the outer face of the HD700’s as they are easily dented.

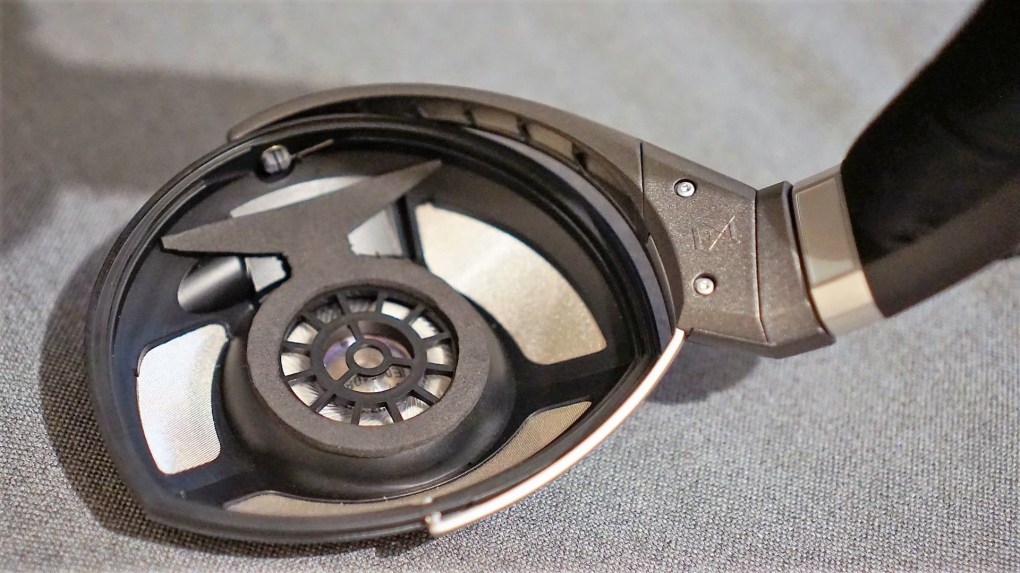
Stock
Remove the adhesive backings off the rings and adhere the foam around the driver baffle as pictured below. I would recommend installing one first to ensure that the sound differences are to your liking.
Anax mod applied
Place the mesh over the earpad, the D-shaped cups will help to keep everything in the correct orientation. The pads can be a little tricky to re-install at first, I’ve found the easiest way to get them back on is to line up one corner and push outwards along the two flanking sides.
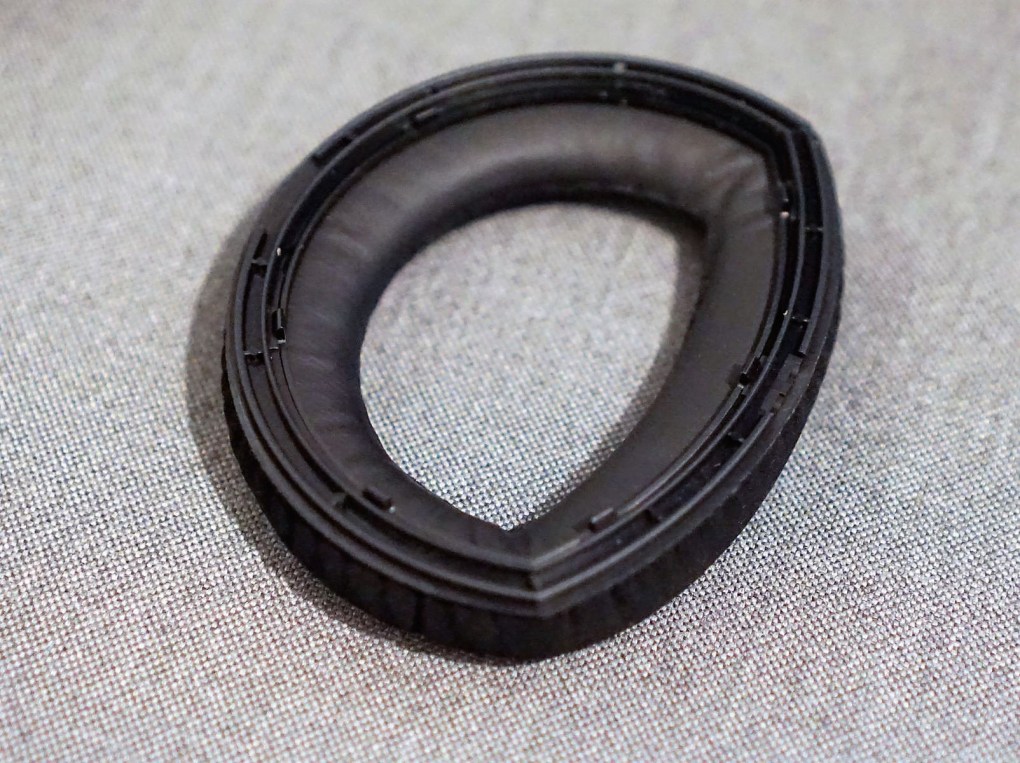
Align the corner and press down, moving outwards
The earpads will click into place, completing the install. Have a quick listen, although changes applied to just one side will be harder to detect, if you generally enjoy the changes then retrace through these steps to install the other side.
Results –

The easiest way to tell if the mod is working is via the soundstage. As aforementioned, it is recommended to install the mod on one side first; you should notice that high notes sound like they are further towards the side without the mod, since high notes will be slightly louder on that side.
When both sides were installed, I noticed a more natural high-end and a slightly fuller sub-bass response. I’m guessing that the foam forms a slightly better seal with the fabric mesh in front, increasing deep bass presence. The rest of the bass is just as resolving as before and the midrange retains its original qualities as well. The high end doesn’t sound closed off or congested nor rolled-off. As expected, the effects are mostly similar to the differences in high-end between the HD800 and HD800S, simply a slight change in tonality that can make a world of difference to your personal listening enjoyment. For me, the soundstage has remained spacious and broad, I confirmed with a few of my personal favourite live recordings. I do feel that the headphones are generally more composed whereas before I felt that the high-end got a bit overzealous, creating glare that masked some details. Ironically, by removing this treble peak, treble actually resolves more detail. So overall, I do prefer the sound with the mods and though I doubt any will have issue with the reduced treble peak, some may not enjoy the bass increases.
There are some factors to consider when performing this modification. Some have mentioned that the type of foam can theoretically have an impact on the sound changes. Personally, I wouldn’t be too concerned as most are identical in composition so you don’t have to go out of your way to find the Creatology foam used in the original Anax mod (any generic brand will do). What does affect this modification is the adhesive employed by the foam. If the adhesive is strong and tacky, you may have difficulties reversing the mod, perhaps for resale or if you prefer the brighter response of the stock headphones. Usually foam isn’t overly adhesive, in fact, the foam I used was barely adhesive at all and is essentially held in place by friction from the mesh covers on top. One down side is actually related to comfort. If you have wider ears that just clear within the HD700’s earcups, they may now contact the fabric mesh since the foam essentially makes the cups 2mm shallower in the centre. My ears do just barely contact the fabric, but I haven’t noticed any discomfort over time with the modification installed.
Ryan Soo
Avid writer, passionate photographer and sleep-deprived medical student, Ryan has an ongoing desire to bring quality products to the regular reader.

I have converted the .psd file to .pdf and printed it but the size is still for the hd 800. Could you let me know at what percentage you’ve downscaled it so that i can do it myself. Or if you have a pdf or png with the right size, send it to my email please, thank you!
LikeLike
@easystufffye
I tried emailing you a copy of the HD 700 template I have on hand and couldn’t find your address. Here’s what to do: Print the image that’s posted here at 100 percent scaling, so it’s the exact dimensions of the HD 700 cup. Hope that helps!
LikeLike
How do I get a copy of the HD700 template? The google doc link requires approval. Thanks
LikeLike
Hi Robert,
I’ve enabled your viewing, sorry for the wait.
Best,
Ryan.
LikeLike
Thanks. The change is subtle but I like how it makes it sound
LikeLike